参考
Playwright介绍
Playwright 是由 Microsoft 开发的一款开源自动化测试框架,它专为现代 Web 应用设计,提供了强大、灵活且易于使用的接口,广泛用于端到端测试(E2E Testing)。
✅ 核心优势
跨浏览器支持:
- ✅ Chromium(如 Chrome、Edge)
- ✅ Firefox
- ✅ WebKit(Safari 所用内核,适用于 macOS/iOS 测试)
多语言支持:
- Node.js(TypeScript / JavaScript)
- Python
- .NET
- Java
跨平台兼容:
- 支持在 Windows、Linux、macOS 上运行
无需额外驱动:
- 不像 Selenium 需要手动配置浏览器驱动,Playwright 内置浏览器下载和驱动控制
适配多种应用类型:
- Web 应用
- 移动端仿真(视口、触摸、UA 伪装等)
- Electron 桌面应用
- PWA / SPA 现代框架项目
🚀 功能特性
- 自动等待页面稳定(如等待网络空闲、元素可见)
- 支持 iframe、popup、multi-tab 等复杂交互场景
- 丰富的定位器支持(通过文本、aria、标签、CSS、XPath 等方式)
- 快照比较 / 录像回放(Trace Viewer)
- 网络请求拦截、Mock、Cookie 注入等高级能力
- Headless / 有头浏览器运行模式切换
- 可集成至 CI/CD 流水线
📲 Playwright 是否支持 App 测试?
- ❌ 不支持原生移动 App(如 Android / iOS)
- ✅ 支持混合 App(Hybrid App)中 WebView 的自动化操作
- ✅ 支持 Electron、Tauri 等桌面端跨平台应用
- 若需原生 App 测试建议使用:
安装
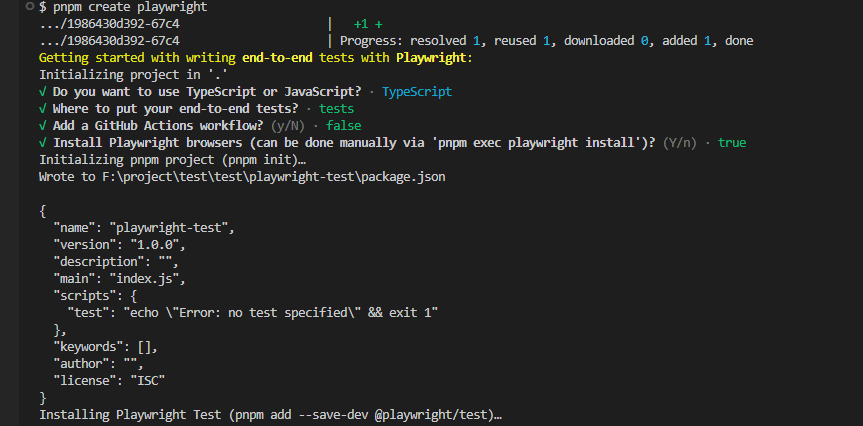
使用 Playwright 初始化一个新项目
运行安装命令并选择以下内容以开始:
在 TypeScript 或 JavaScript 之间进行选择(默认为 TypeScript)
测试文件夹的名称(默认为 tests,如果项目中已有 tests 文件夹,则默认为 e2e)
添加 GitHub Actions 工作流程以轻松在 CI 上运行测试
安装 Playwright 浏览器(默认为 true)

基础命令
1
2
3
4
5
6
7
8
9
10
11
12
|
pnpm exec playwright test
pnpm exec playwright show-report
pnpm exec playwright test --ui
pnpm exec playwright codegen
|
一些--后缀
--load-storage=auth.json:加载存储文件,用于加载登录状态--save-storage=auth.json:保存存储文件,用于保存登录状态--viewport-size=1280,720: 设置浏览器窗口大小--project=webkit: 指定浏览器内核(chromium|firefox|webkit),默认为 chromium
配置路径别名
安装tsconfig-paths
1
| pnpm add tsconfig-paths -D
|
playwright.config.ts 头部引入
1
2
3
4
| import 'tsconfig-paths/register';
export default defineConfig({
})
|
tsconfig.json
1
2
3
4
5
6
7
8
| {
"compilerOptions": {
"baseUrl": "./",
"paths": {
"@utils/*": ["./utils/*"],
}
}
}
|
使用
1
| import { get } from '@utils/helper';
|
一些使用
登录状态的保存与加载
方式一:运行这个命令,会自动打开浏览器,接着自己手动登录,登录状态就会保存到 auth.json 文件中
1
| pnpm exec playwright codegen --save-storage=auth.json
|
方式二:配置全局注册globalSetup
这样每次跑测试前,都会自动执行这个函数,登录状态就会保存到 auth.json 文件中
playwright.config.ts
1
2
3
4
5
6
7
8
9
10
11
12
13
14
15
16
17
18
19
20
21
22
23
24
| import { defineConfig, GlobalSetup, chromium, type FullConfig } from '@playwright/test';
export default defineConfig({
use: {
storageState: 'auth.json',
baseURL: 'https://example.com',
},
globalSetup(config: FullConfig) {
const { baseURL, storageState } = config.projects[0].use;
const browser = await chromium.launch();
const page = await browser.newPage();
await page.goto(baseURL!);
await page.getByLabel('User Name').fill('user');
await page.getByLabel('Password').fill('password');
await page.getByText('Sign in').click();
await page.context().storageState({ path: storageState as string });
await browser.close();
}
})
|
外部环境变量传入与使用
执行tests/pur.spec.ts的脚本,并传入环境变量env=prod
1
| env=prod pnpm playwright test tests/pur.spec.ts
|
接收
1
| const env = process.env.env || 'dev';
|
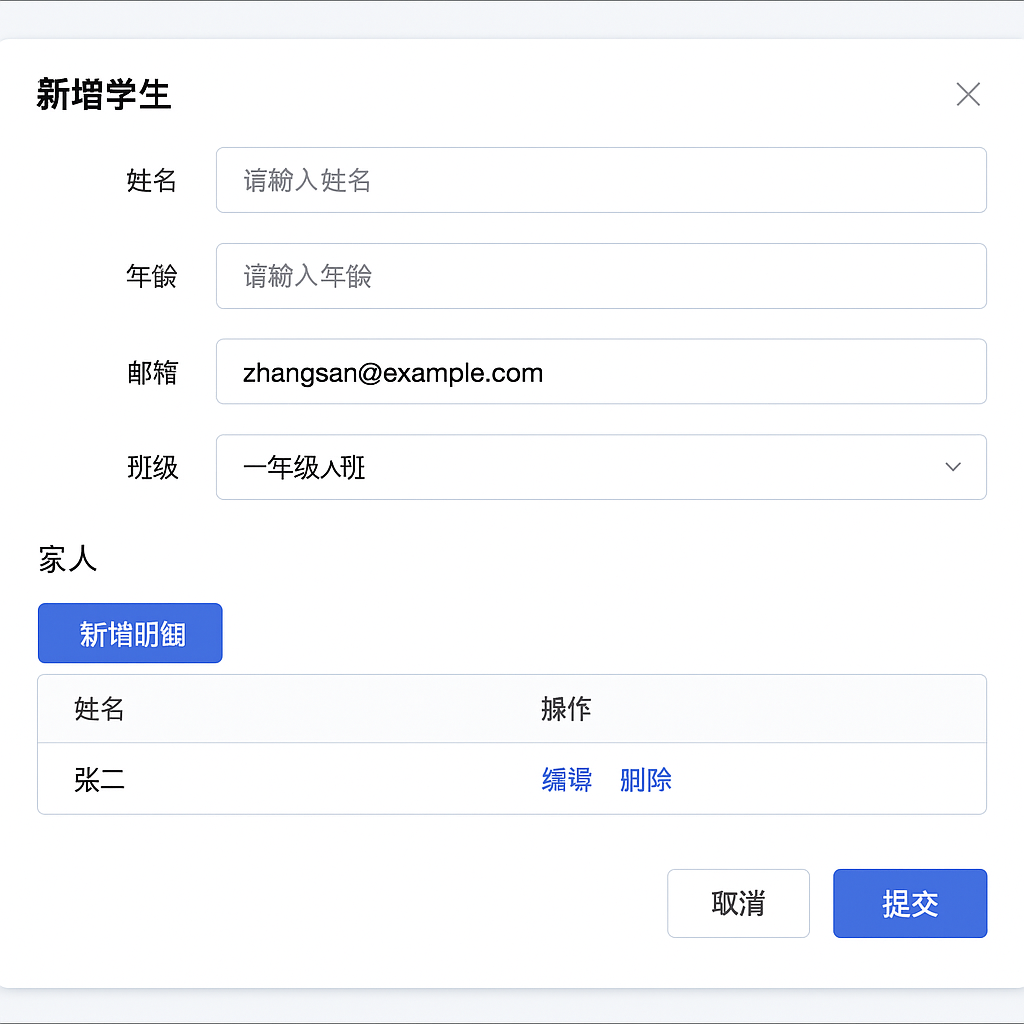
单个完整的测试用例
- 使用的到UI
Element-Plus、Vxe-Table,涉及输入框、下拉框、表格、弹窗 - 流程填写表单(学生信息)、表格(家人)、提交表单、弹窗确认、审核通过
1
2
3
4
5
6
7
8
9
10
11
12
13
14
15
16
17
18
19
20
21
22
23
24
25
26
27
28
29
30
31
32
33
34
35
36
37
38
39
40
41
42
43
44
45
46
47
48
49
50
51
52
53
54
55
56
57
58
59
60
61
62
63
64
65
66
67
68
69
70
71
72
73
74
75
76
77
78
79
80
81
82
83
84
85
86
87
88
89
90
91
92
93
94
| import { test, expect } from '@playwright/test';
export async function getTableColumnIndex(page: Page | Locator, headerText: string | RegExp): Promise<number> {
const headers = await page.locator('thead th').all();
for (let i = 0; i < headers.length; i++) {
const textContent = await headers[i].textContent();
if (typeof headerText === 'string') {
if (textContent?.includes(headerText)) return i
} else {
if (headerText.test(textContent)) return i
}
}
return -1;
}
export const getTableColumnLocator = async (page:Page | Locator, headerText: string | RegExp, rowIndex: number = 1) => {
const columnIndex = await getTableColumnIndex(page, headerText);
return page.locator(`.vxe-table--body tr.vxe-body--row:nth-child(${rowIndex}) td:nth-child(${columnIndex + 1})`)
}
test('新增学生', async ({ page }) => {
await page.goto('https://example.com');
await page.waitForLoadState('networkidle');
await expect(page.locator('.el-loading-mask')).toBeVisible({ visible: false });
await page.getByPlaceholder('请输入姓名').fill('张三');
await page.getByText('请选择班级').click();
const classLocator = page.getByRole('option', { name: '一年级A班' })
await classLocator.scrollIntoViewIfNeeded()
await classLocator.click();
await page.getByRole('button', { name: '新增明细' }).click();
const relativeLocator = await getTableColumnLocator(page, '姓名')
await relativeLocator.scrollIntoViewIfNeeded();
await relativeLocator.click();
await page.waitForTimeout(100);
await relativeLocator.locator('input').fill('张二');
await page.getByRole('button', { name: '保存' }).click();
await page.getByRole('button', { name: '确定' }).click();
await expect(page.getByText('新增成功')).toBeVisible({ visible: true });
await page.getByRole('button', { name: '审核' }).click();
await page.getByRole('button', { name: '确定' }).click();
await expect(page.getByText('审核成功')).toBeVisible({ visible: true });
})
|